Study on Counter Movement Jump Performance in a Force Platform – Part 3
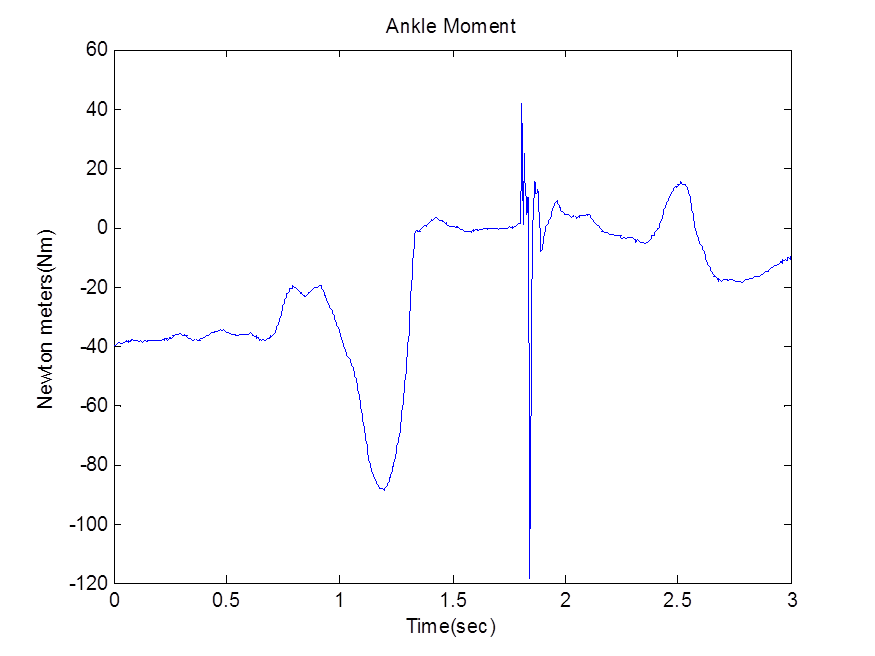
Figure 3.a. Ankle Moment
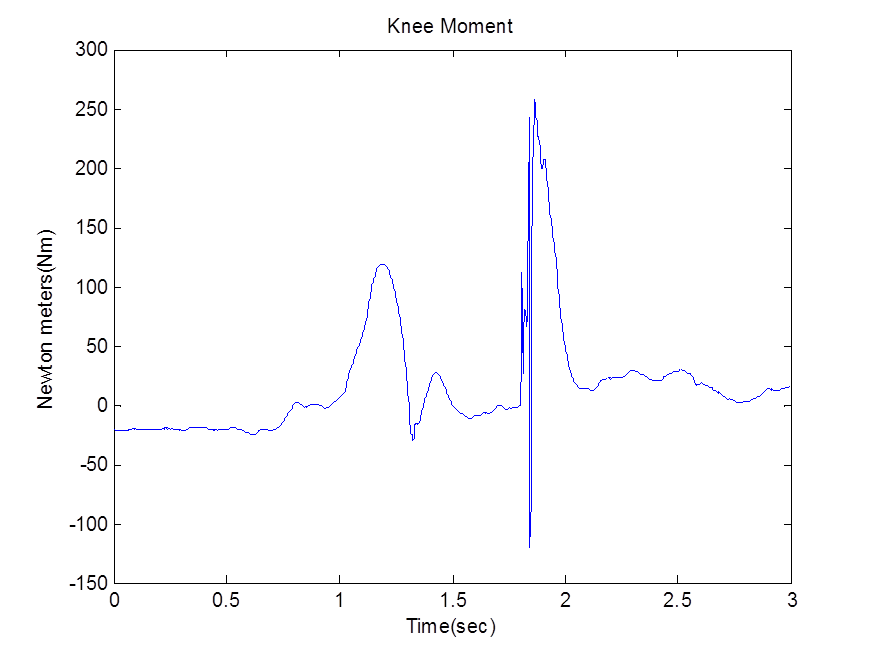
Figure 3.b. Knee Moment
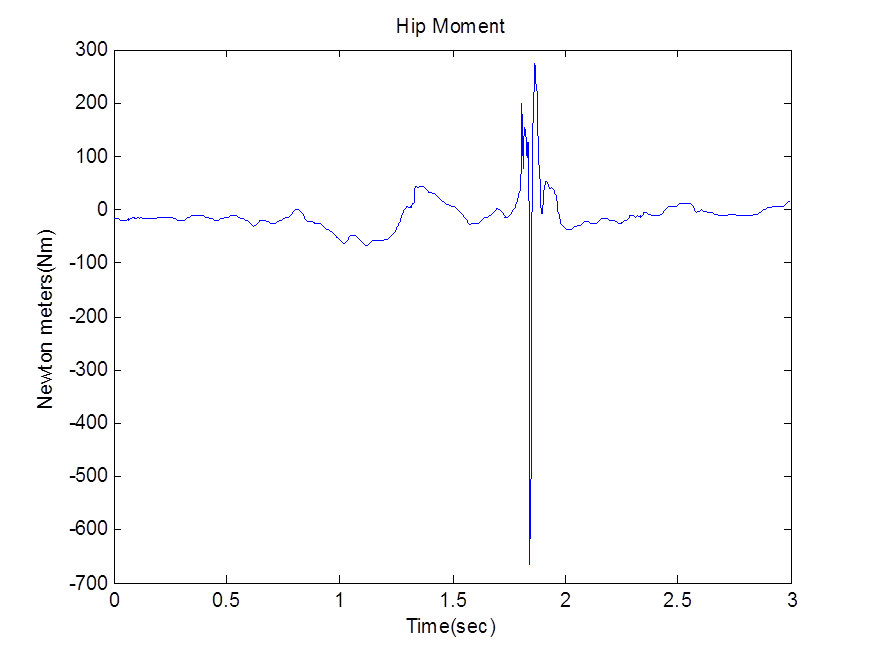
Figure 3.c. Hip Moment
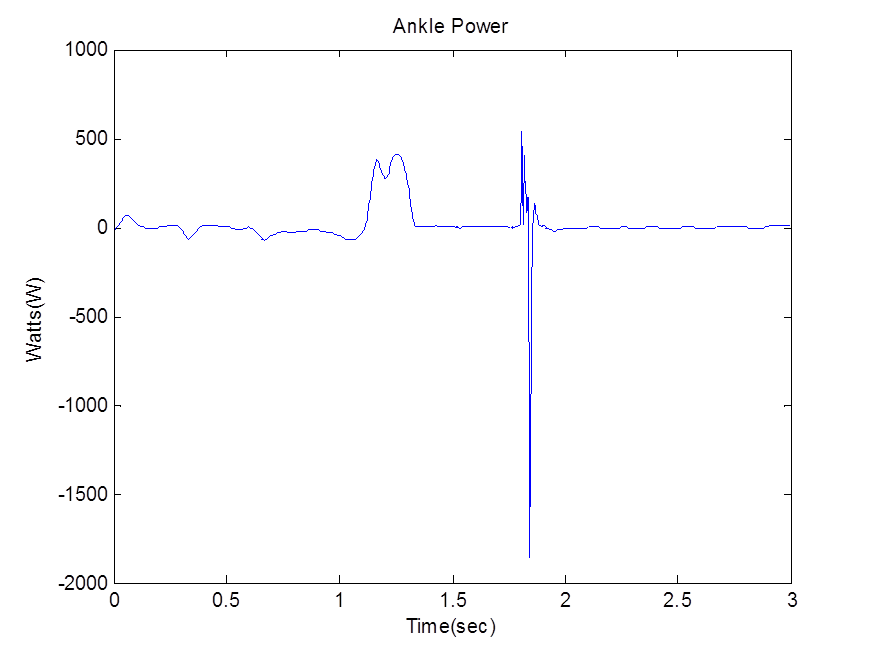
Figure 4. a. Ankle Power
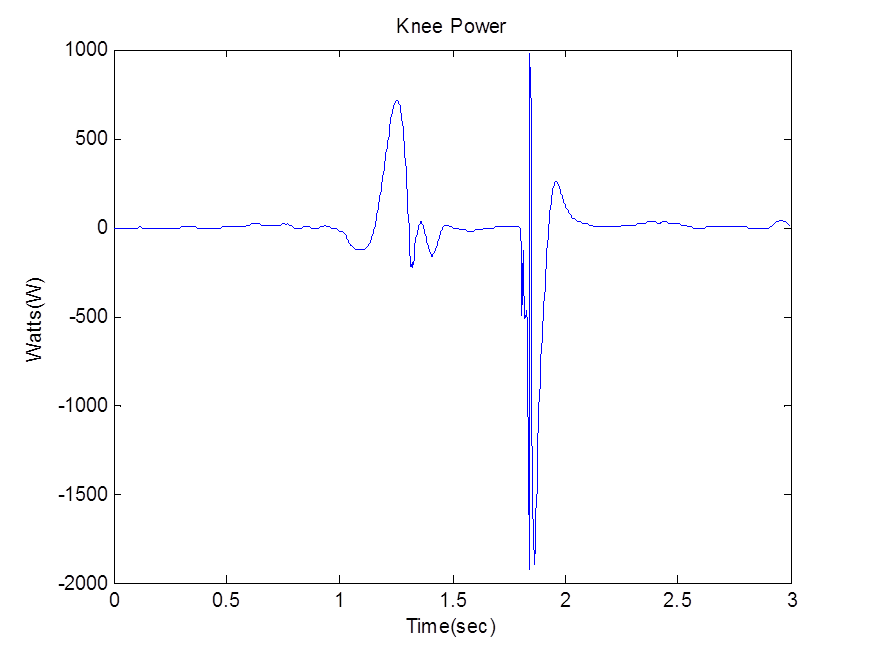
Figure 4. b. Knee Power
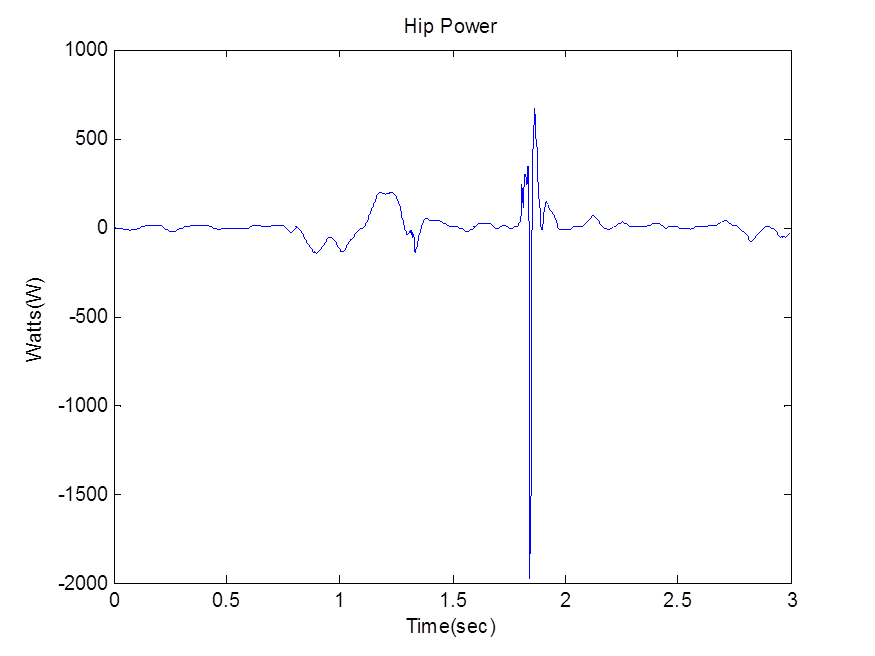
Figure 4.c. Hip Power

Study on Counter Movement Jump Performance in a Force Platform – Part 2

The Determinants of Energy Cost during Exercise; Anaerobic and Lactate Threshold. A lab report

One Comment